It's
a snap!
 The
digital camera should herald a bit of a revolution within the classroom.
A recent survey suggested that 70% of the material that children
between the ages of 7-18 access is visual, this includes still and
movie image and yet so much of the material that we use in school,
especially in the classroom and produced by the students is textual. The
digital camera should herald a bit of a revolution within the classroom.
A recent survey suggested that 70% of the material that children
between the ages of 7-18 access is visual, this includes still and
movie image and yet so much of the material that we use in school,
especially in the classroom and produced by the students is textual.
Let's
first think about the practical aspects. Once it has been bought
the cost of using the camera is practically zero. It is important
to check that your chosen camera can use rechargeable batteries,
or has a built-in rechargeable battery, and that you have a reasonably
sized memory card [These come in MB and typically are 32Mb, 64Mb,
128Mb, 256Mb or 512Mb for most digital cameras - though card as
big as 4Gb can be purchased for some cameras]. Check your camera
documentation for the biggest card your camera can hold. A reasonable
quality image might have a file size of 512kb and so your card could
hold between 50 and 500 images.
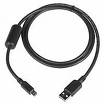 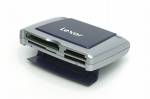 To
connect your camera to a computer you will either need to connect
the cable or use a card reader. This will allow you transfer the
images to the hard drive of the computer. Most cables will connect
to the UBS port on your computer and the card reader will probably
plug into the same port. For more details about connecting digital
cameras to computers. [PC
- Mac] To
connect your camera to a computer you will either need to connect
the cable or use a card reader. This will allow you transfer the
images to the hard drive of the computer. Most cables will connect
to the UBS port on your computer and the card reader will probably
plug into the same port. For more details about connecting digital
cameras to computers. [PC
- Mac]
So
what might I do with it?
Ten
simple things that you might do with a digital camera in your classroom:
|
1 |
Getting
the right picture: Are you collecting images as you
travel? Or images of local places of worship or local people?
Capturing images of nature can for RE work on creation? It can
be difficult to find large format quality images on-line. Have
a look at Education
Photos for a developing image bank. |
|
2 |
Vox
Pops: Capture some spoken materials alongside some
visual or use voice narration in PP for the students to add
a track alongside the images you have used to capture their
ideas and thoughts. |
|
3 |
Photomontages:
Work with the students to produce digital photomontages to aid
reflection on a topic. This can include work that they have
produced as well as images from other sources. Try Photostory
3 an excellent piece of free software. |
|
4 |
Capturing
the moment: So much of the stuff that happens in lessons
is ephemeral. Use the digital camera to catch those moments
of achievement that otherwise would be lost. This might be a
mind-map, a visitor, a presentation, a dramatic poem, an artefact,
a special moment |
|
5 |
Stop-Action:
Use the camera to capture a series of 'freeze-frames' when producing
a dramatic story or action. These could be imported in a presentation
package and then a textual or voice narration added or could
be displayed using the video projector and spoken over by the
students. |
|
6 |
Group
Photo: If students are collaborating on a piece of
work then a photo of the group (and aspects of the work) will
help with the group cohesion. |
|
7 |
In
the booth: If the camera can capture sound then it
can act like a 'big brother' recorder for ethical or moral issues.
This can be great for starters and plenaries. |
|
8 |
Home
/ Schools liason: Images on the departmental website
or e-mailed to parents will add a real 'sais quoi' to the learning
in RE and may provide a talking point between the paretns and
the stduent. |
|
9 |
Adapt.
Adopt, Amend: Images add sparkle to presetations whether
they are yours or the students. A picture paints a thosand words. |
|
10 |
Bigger,
better, brighter: A lesson can be built around an image
or a series of images. What about different faces of Jesus,
or stages on the Hajj, or prayer aids that stimulate discussion,
debate and dialogue the 3 D's of RE - much better than those
three R's |
|
